MICROTIA SURGERY - SURGICAL DETAILS
1st Stage HARVESTING OF RIB CARTILAGE, SCULPTING OF NEW EAR, PLACEMENT INTO SKIN POCKET
Natural Rib Cartilage

The 6th and 7th ribs are usually fused together and will form the base framework of the new ear. The 8th rib is used to form the rim of the ear called the “helix”. The three small pieces are carved into the shape of a normal ear.
Small Incision

A slightly oblique chest incision is made over the 6th, 7th and 8th ribs close to the sternum (on the opposite side of the microtic ear). On a thin child, the incision is very small…usually around 1 inch in length.
The Ear Location is Marked

Final Result of 1st Stage

The earlobe is rotated on the next stage.
Amazing appearance of ear during 1st surgery!
The ear is marked and an incision is made in front of the ear. The new natural cartilage ear is placed under a skin pocket. A drain is placed in the skin pocket to allow for suction of the skin over the cartilaginous framework.
2nd STAGE Creation of the Earlobe, Sculpting of the Tragus, Deepening of the Conchal Bowl
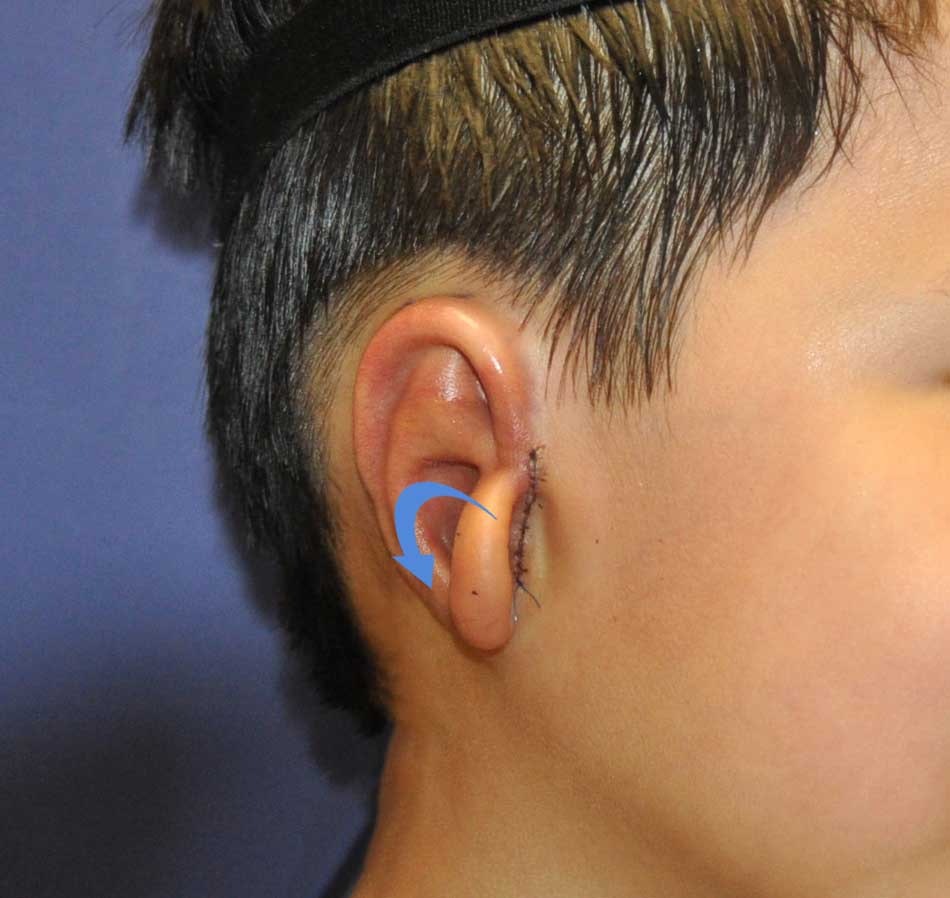
The Earlobe Is Rotated

In this image, the arrow shows how the earlobe will be rotated to its final position so the full ear is now one structure.
Note that the skin color using this technique is the natural skin color because a skin graft is not needed for the outside of the ear (like the polyethylene technique).
Post-operative View

This image shows a patient who has had the earlobe moved to its final position. The concha or “bowl” of the ear is deepened and the tragus is formed.
After two months, the patient is now ready for the final separation procedure.
3rd STAGE Elevation Procedure

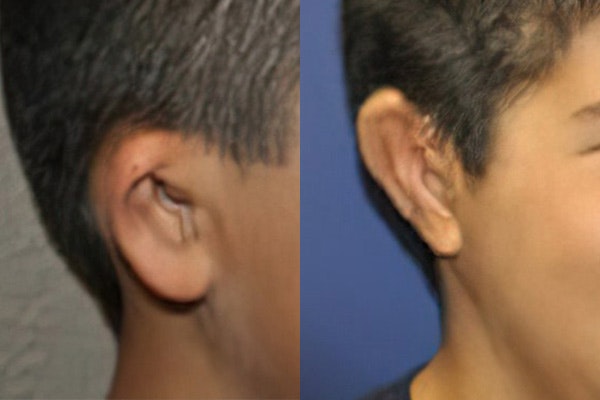
This is another example of a patient with microtia after the elevation procedure. The ear now has excellent protrusion. Note that there is no color difference on the ear because there is no skin graft on the visible part of the ear. There is no danger of fracture or extrusion because the ear is made of natural cartilage.
During this last surgery, a bone-anchored hearing aid may be placed by Dr. Bonilla in order to avoid a separate scar behind the ear.
Learn more about the Future of Microtia Surgery!


